Articles
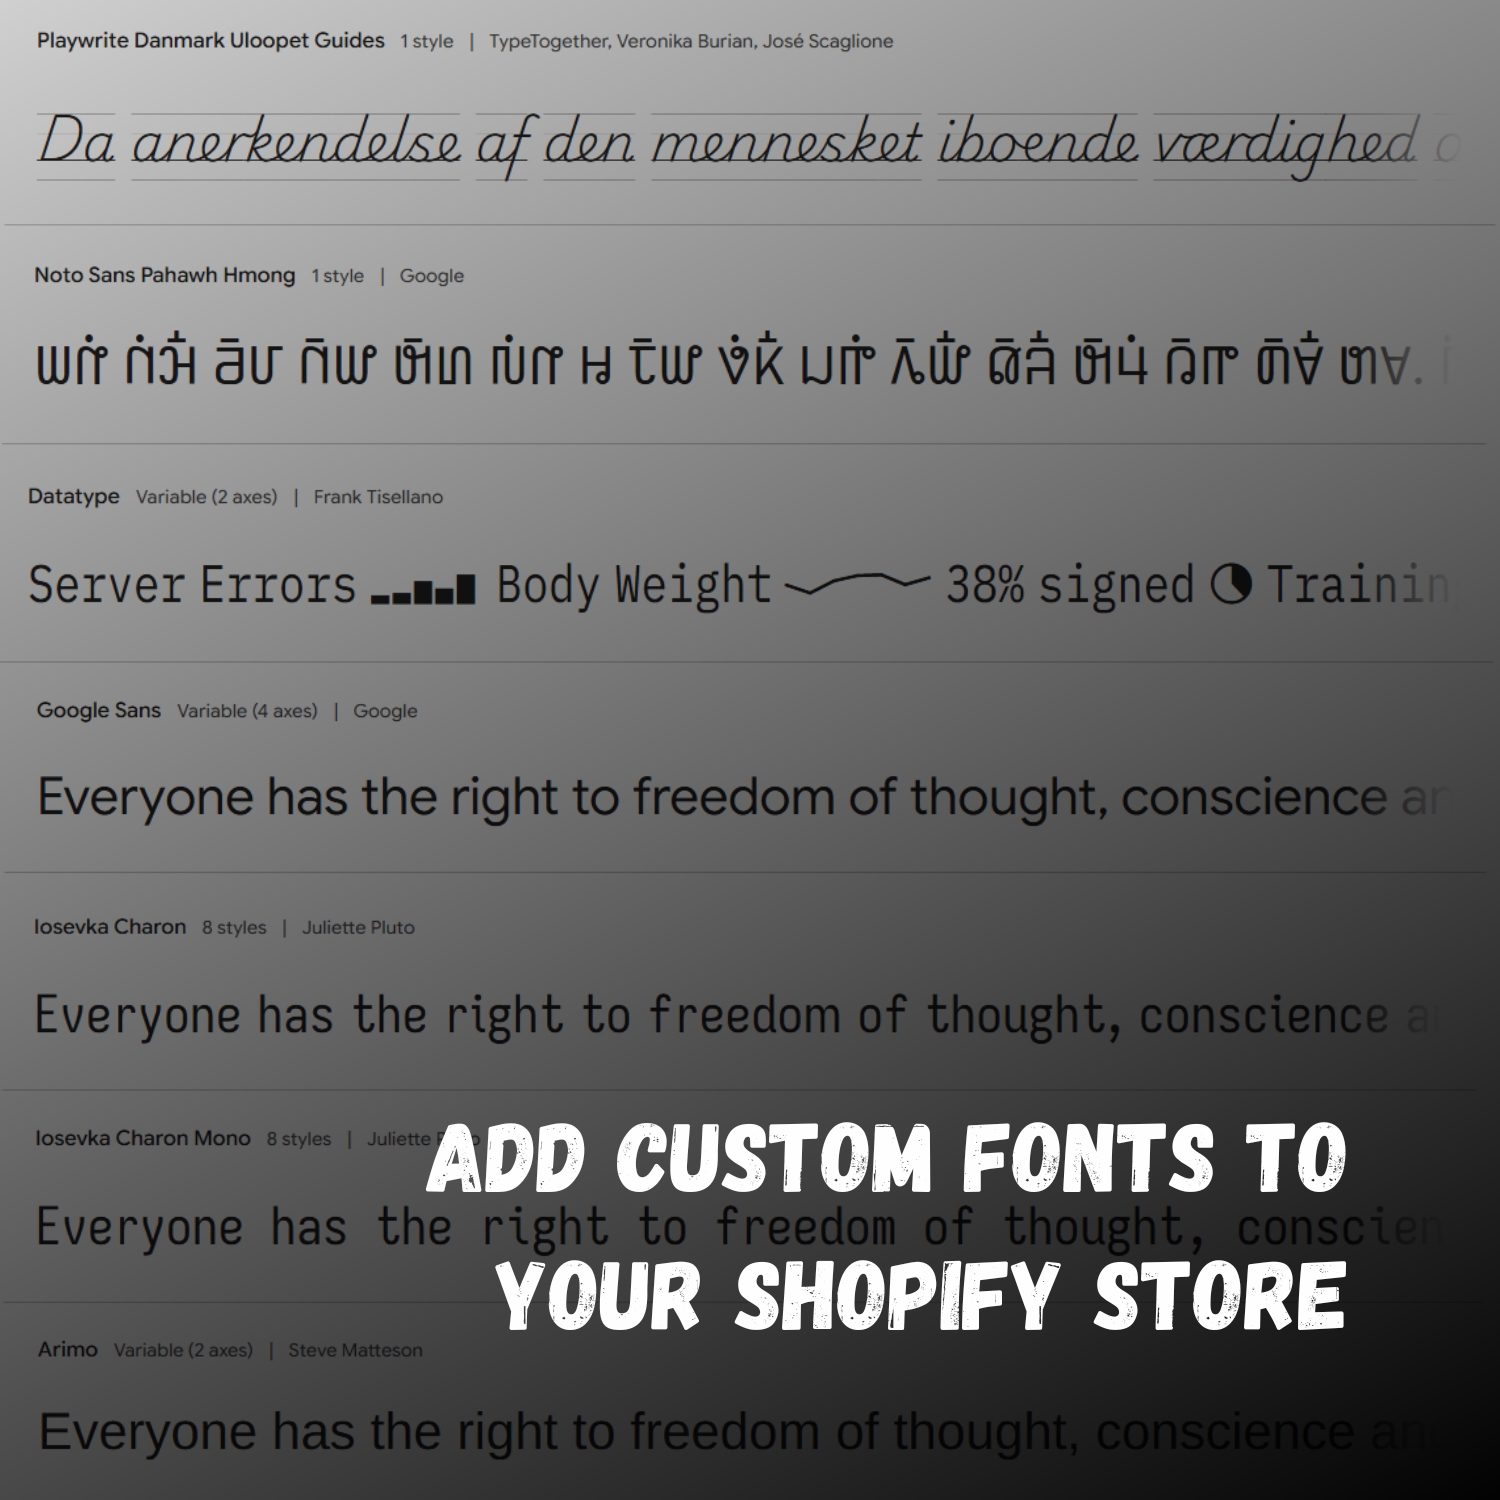
How to Add Custom Fonts in Shopify (Step-by-Step Guide)
Want to turn your Shopify store into a real brand but stuck using the same basic fonts as everyone else?
That’s the problem. Shopify only gives you a limited selection of fonts for headings, body text, and subheadings. And if you care about branding, that limitation holds you back.
In this guide, you’ll learn exactly how to add custom fonts to your Shopify store step by step, so your store looks unique, professional, and built to convert.
In this guide, we’ll be using “Emblema One” from Google Fonts as our example. It’s a clean, bold font that works great for headings and instantly makes your store stand out.
Downloading fonts from Google Fonts is simple but if you’ve never done it before, I’ll quickly walk you through how to download and extract the files so you don’t waste time figuring it out yourself.
Before we move forward, here’s what you need to know: Shopify supports font file formats like WOFF, WOFF2, TTF, and OTF. Google Fonts typically provides TTF files, which we’ll be using in this tutorial to upload and apply custom fonts to your store’s headings.
Download Font from Google Fonts
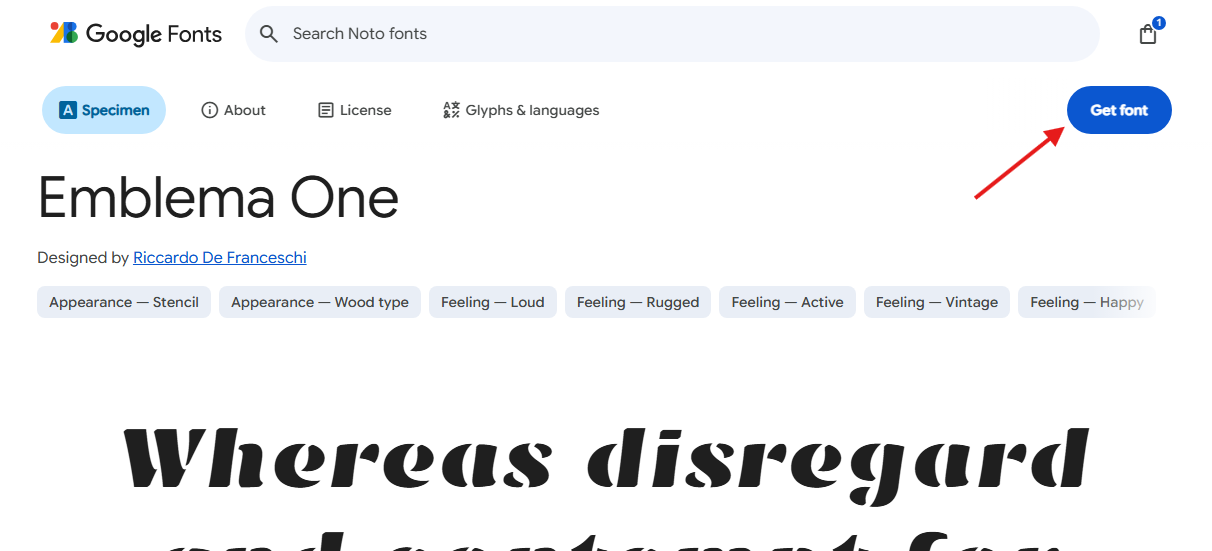
To get started, head over to Google Fonts: https://fonts.google.com/ and search for “Emblema One” using the search bar. Once you find the font, click on Get Font Button. From there, you can download it directly to your computer.
If you’re unsure where to click, refer to the screenshot below for guidance:
Upload the Font File to Your Shopify Store
Now it’s time to upload the font to your Shopify store.
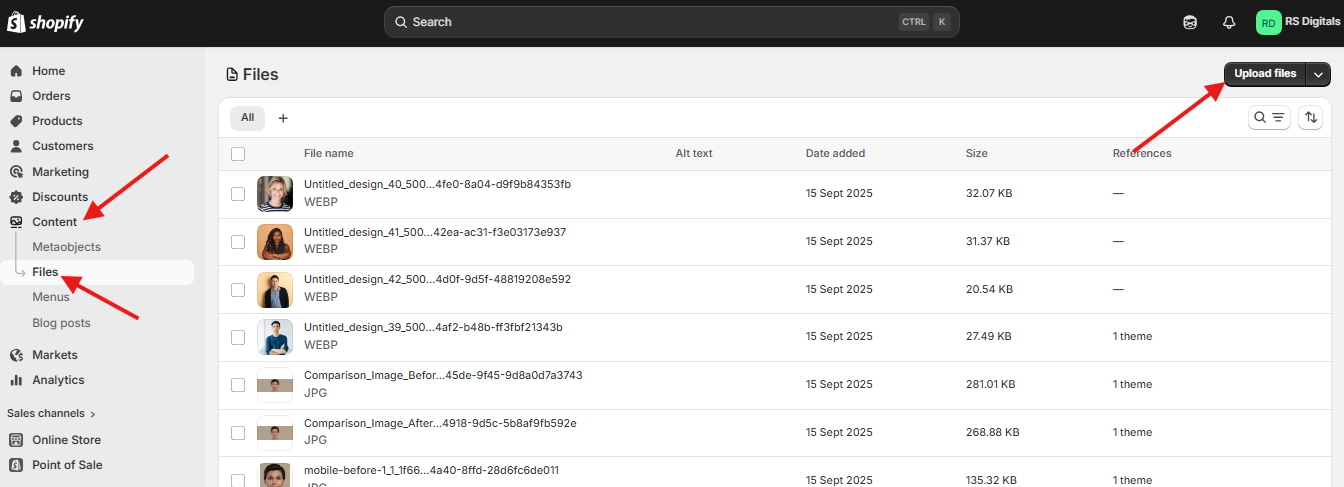
From your Shopify dashboard, go to Content → Files. This will take you to the file manager where you can store and manage uploaded assets. Once you’re on the Files page, click the “Upload files” button in the top right corner and select the font file you downloaded earlier.
Important: Make sure you upload the TTF file, not the ZIP file. If you downloaded a ZIP from Google Fonts, extract it first, then upload the actual font file.
If you’re not sure where to click, refer to the screenshot below for visual guidance:
Now let’s move on to the CSS part, where we’ll actually apply the custom font to your store. We’ll be adding a small piece of code inside the theme.liquid file. Don’t worry it’s straightforward. We’ll also need the font file URL, which you uploaded earlier. I’ll show you exactly how to grab it in the next step, right when we need it.
Add CSS Code to the theme.liquid File
To add the custom font, you’ll need to access your theme’s code editor. From your Shopify dashboard, go to Online Store → Themes. Find your active theme, click the three dots (•••) next to it, and then select “Edit code” from the dropdown menu. This will open the theme code editor, where we’ll be making the changes.
If you’re not sure where to click, refer to the screenshot below for guidance:

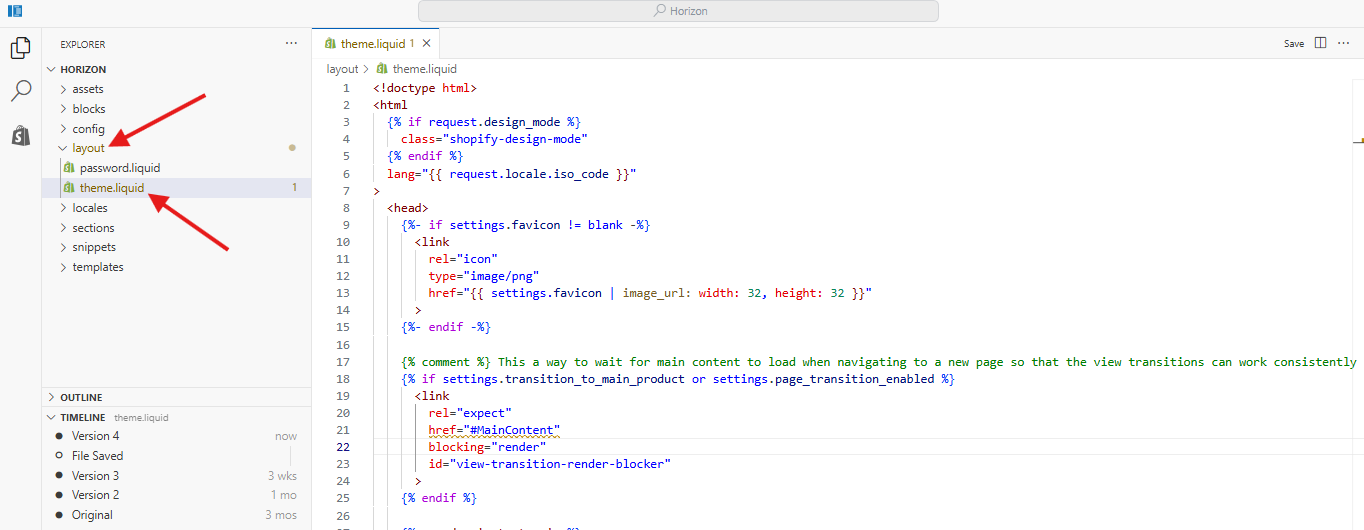
Once you’ve opened the code editor, look for the Layout folder in the left sidebar. Inside that folder, click on theme.liquid to open the main layout file of your store. This is where we’ll be adding the custom CSS.
If you’re unsure, refer to the screenshot below for guidance:
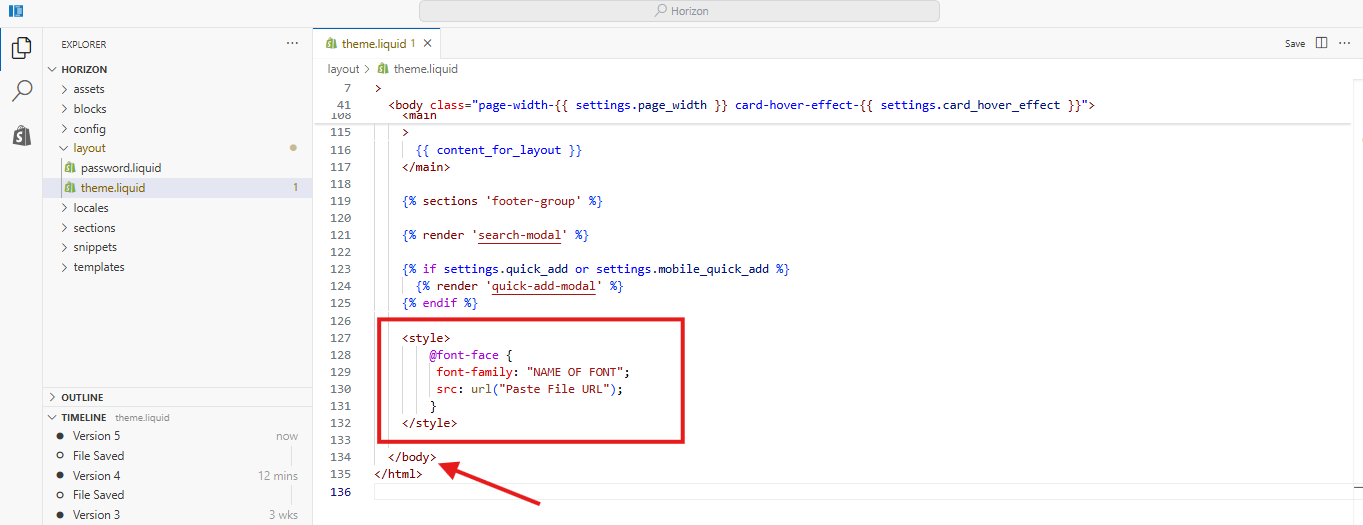
Once you’ve opened the theme.liquid file, scroll all the way down and locate the closing “</body>” tag. Right above this tag, paste the following CSS:
<style>
  @font-face {
    font-family: "NAME OF FONT";
    src: url("PASTE FILE URL");
  }
</style>
Make sure you place this code directly above the closing “</body>” tag otherwise it may not load correctly. In the next step, we’ll replace the placeholder values with your actual font name and file URL.
If you’re unsure where to paste the code, refer to the screenshot below for guidance.
The CSS we added needs a quick update to actually work.
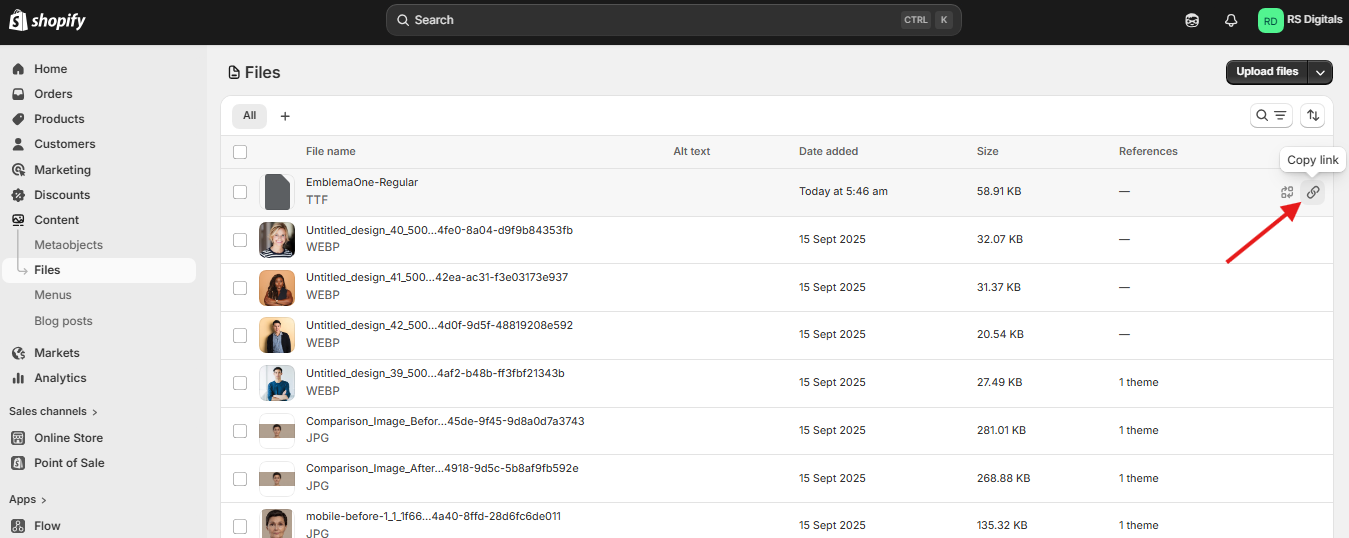
For the font-family, you can name it anything but keep it simple and relevant. Since we’re using Emblema One, we’ll set it to “Emblema”. For the src, you need to paste the font file URL you uploaded earlier. Go back to the Files section in Shopify, click the copy link icon next to your font file, and paste that link inside the url().
If you’re not sure how to copy the file URL, refer to the screenshot below:
Once you’ve replaced the font name and added your file URL, your final CSS should look like this:
    <style>
        @font-face {
         font-family: "Emblema";
         src: url("https://cdn.shopify.com/s/files/1/0641/5066/7316/files/EmblemaOne-Regular.ttf?v=1774345572");
        }
    </style>
Make sure everything is spelled correctly and the file URL is properly pasted one small mistake here can prevent the font from loading.
Apply the Font to Your Store Headings
Now it’s time to actually use your custom font. In most Shopify themes, headings are defined using standard HTML tags like H1, H2, H3, etc. However, some themes use CSS classes such as .h1, .h2, .h3 instead. The smartest move? Check your theme using Inspect Element to see which selectors it uses. That way, you’re applying the font correctly instead of guessing. For this guide, we’ll cover both approaches to make sure it works across most themes.
Add the following CSS below your font declaration:
h1, h2, h3, h4, h5, h6,
.h1, .h2, .h3, .h4, .h5, .h6 {
  font-family: "Emblema", sans-serif;
}
This will apply your custom font to all heading elements across your store.
Once everything is in place, your final code should look like this:
<style>
  @font-face {
    font-family: "Emblema";
    src: url("https://cdn.shopify.com/s/files/1/0641/5066/7316/files/EmblemaOne-Regular.ttf?v=1774345572");
  }

  h1, h2, h3, h4, h5, h6,
  .h1, .h2, .h3, .h4, .h5, .h6 {
    font-family: "Emblema", sans-serif;
  }
</style>
After adding this, your custom font will be applied to all heading elements across your store. Make sure you save the file, then refresh your storefront to see the changes live.
Conclusion
Adding custom fonts to your Shopify store is one of the simplest ways to make your brand stand out. Instead of relying on default fonts that everyone else is using, you now have full control over how your store looks and feels. By following this step by step guide, you’ve learned how to download a font, upload it to Shopify, and apply it using CSS. It might seem technical at first, but once you’ve done it once, it becomes a quick and repeatable process. Take a few minutes to test different fonts and see what fits your brand best because small design details like typography can make a big difference in how your store is perceived.