Articles
Custom Data in Shopify: Explained + How to Use It to Create Custom Metafields
If you’re the owner of your own Shopify shop, you’ve been told about customized information. What exactly is it? It is a term used in Shopify “custom data” refers to extra information you are able to store on your clients, products, and other elements of your store. The data doesn’t belong to the standard Shopify fields, but is placed in metafields to personalize your store’s layout and offer better shopping experiences.
Metafields are a flexible way to store extra information like:
- Product dimensions
- Custom instructions for care or use
- Additional images or videos
- Detailed specifications
The beauty of custom data is that it allows you to adapt your Shopify store to meet your brand’s unique needs without heavy coding or complex integrations.
In today’s article, we’ll show you how to create a metafield for a product to display a short description on your product pages. This will allow you to add unique short descriptions for each product in your Shopify store, giving you greater flexibility and customization.
If you’re short on time or prefer visuals, feel free to check out the video below instead of reading the full article:
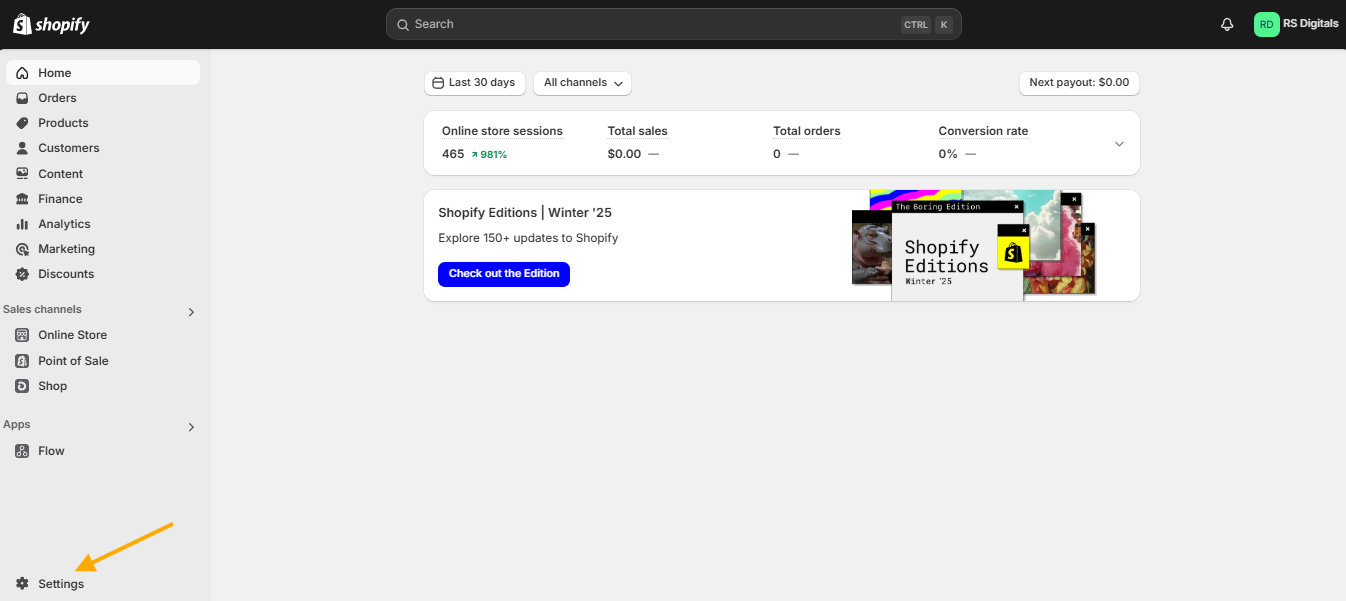
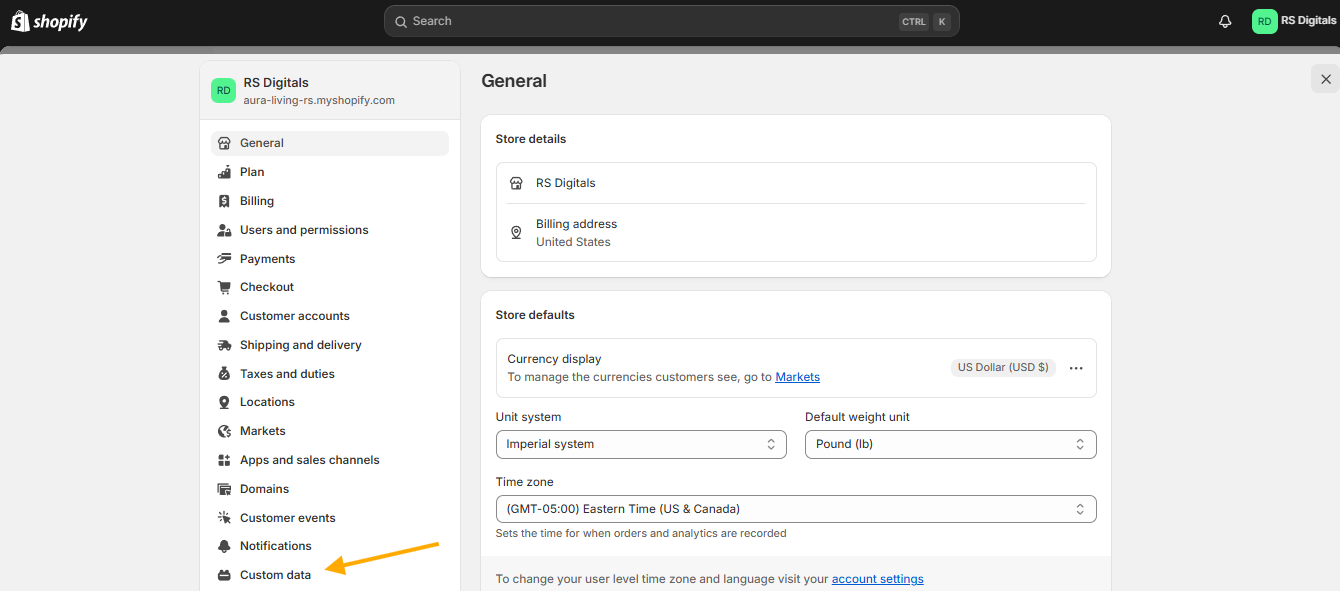
To begin creating a short description metafield for a product, start by clicking on Settings in your Shopify dashboard. Next, navigate to Custom Data and click on it to access the metafields setup.
Refer to the screenshots below for visual guidance:
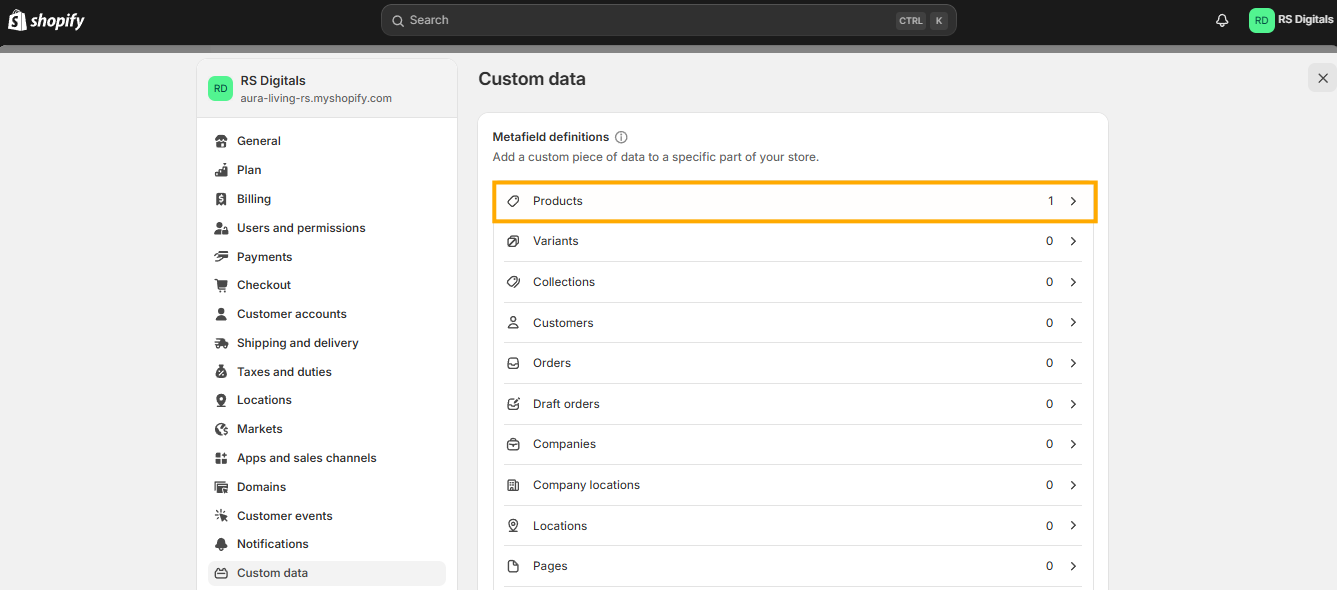
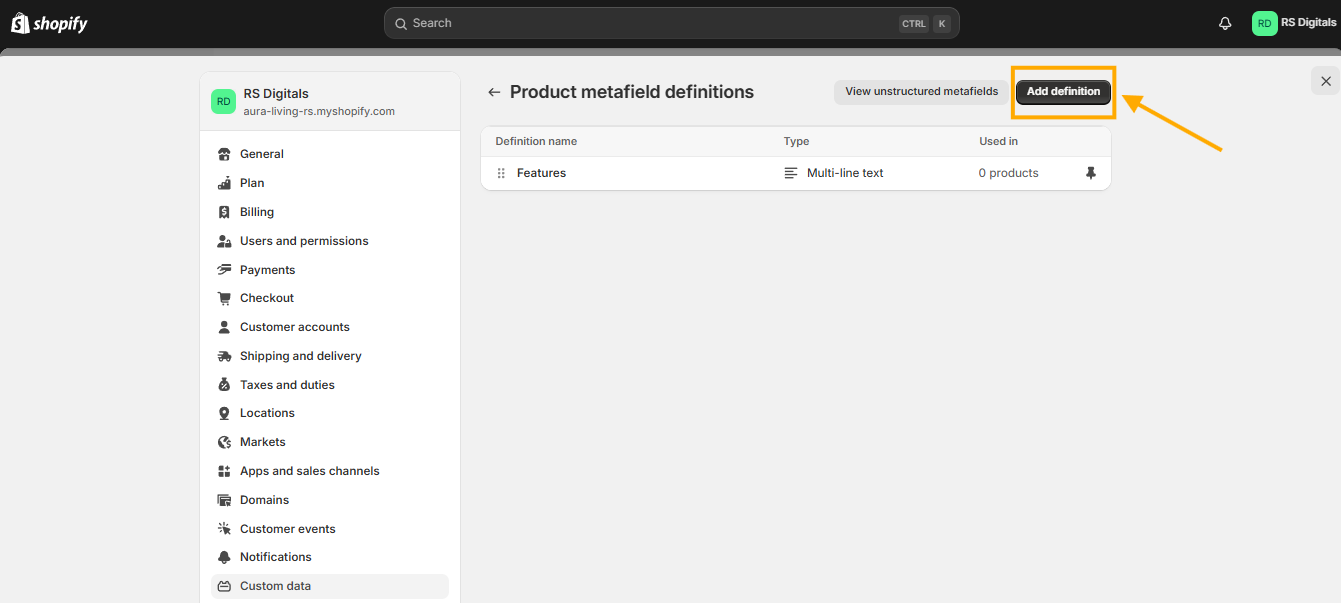
The Custom Data page there are options for you to build metafields specifically for products and Variants, Collections customers, orders Pages, Blogs, and more. This step-by-step guide will help you create a metafield. we’ll be focusing on the creation of specific metafields to be used with Products. It will enable us to provide unique and concise descriptions for each item. To get started, navigate to the Custom Data page and select Products from the list.
Refer to the screenshot below for visual guidance:
On the next page, click the Add Definition button located at the top-right corner. Refer to the screenshot below for visual guidance:
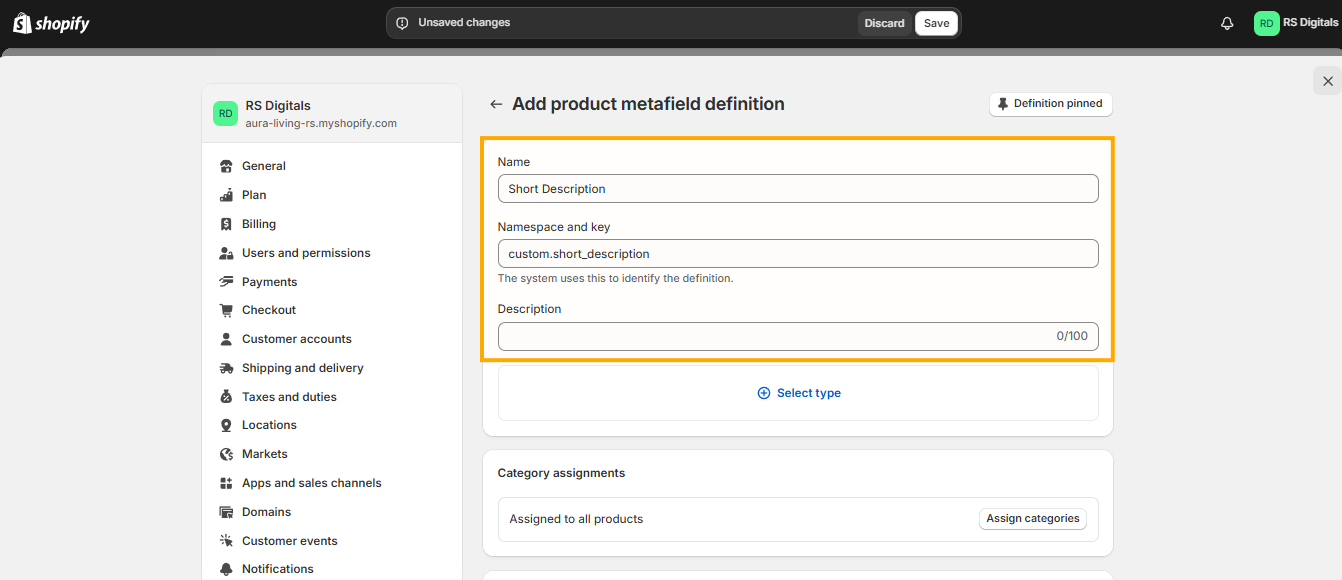
In the Name field, enter the name for the metafield you’re creating. In our case, we’ll name it Short Description since we’ll be adding short descriptions for the products in this metafield.
For the Namespace and Key, Shopify’s core system uses this to identify the metafield. You don’t need to manually add anything here, as Shopify will automatically create the namespace based on the name you enter in the Name field.
You can add more details about this metafield in the Description field if you’d like, but this step is optional, and you can leave it blank if you prefer.
Refer to the screenshot below for visual guidance:
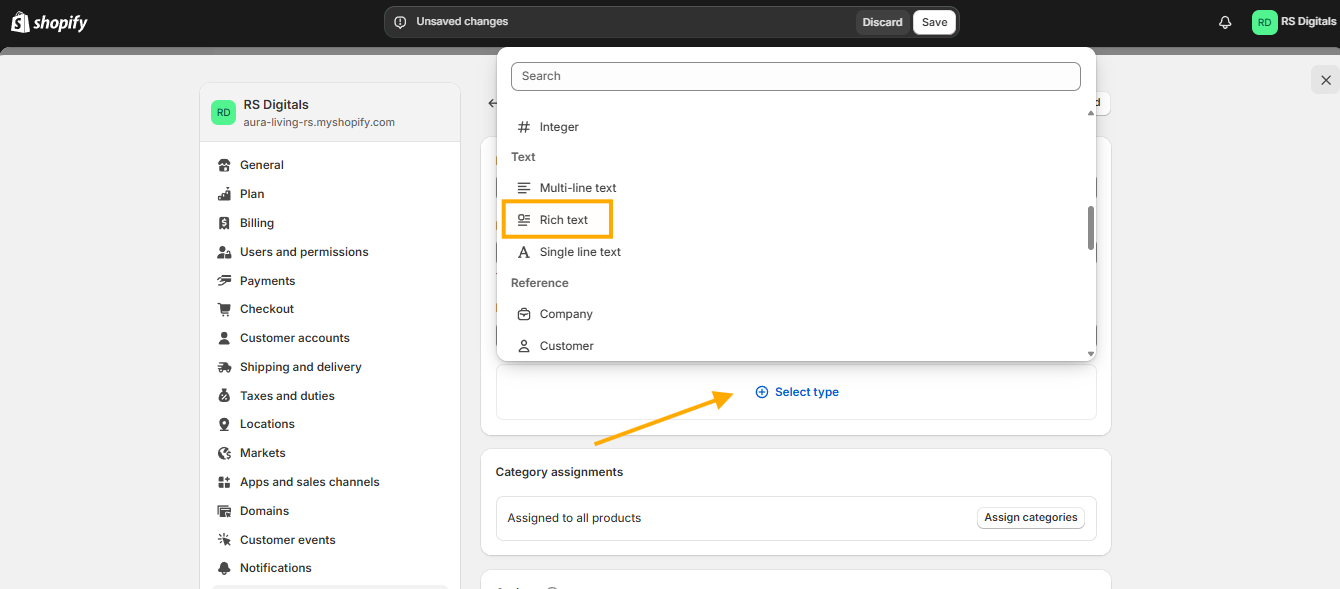
Next, we need to select a type for this metafield. Since the short description consists of text, I’ll be selecting the Rich Text type for this metafield. If you were adding images or other types of information, you would choose the appropriate type accordingly. Simply click the Select Type button and choose Rich Text. Refer to the screenshot below for visual guidance:
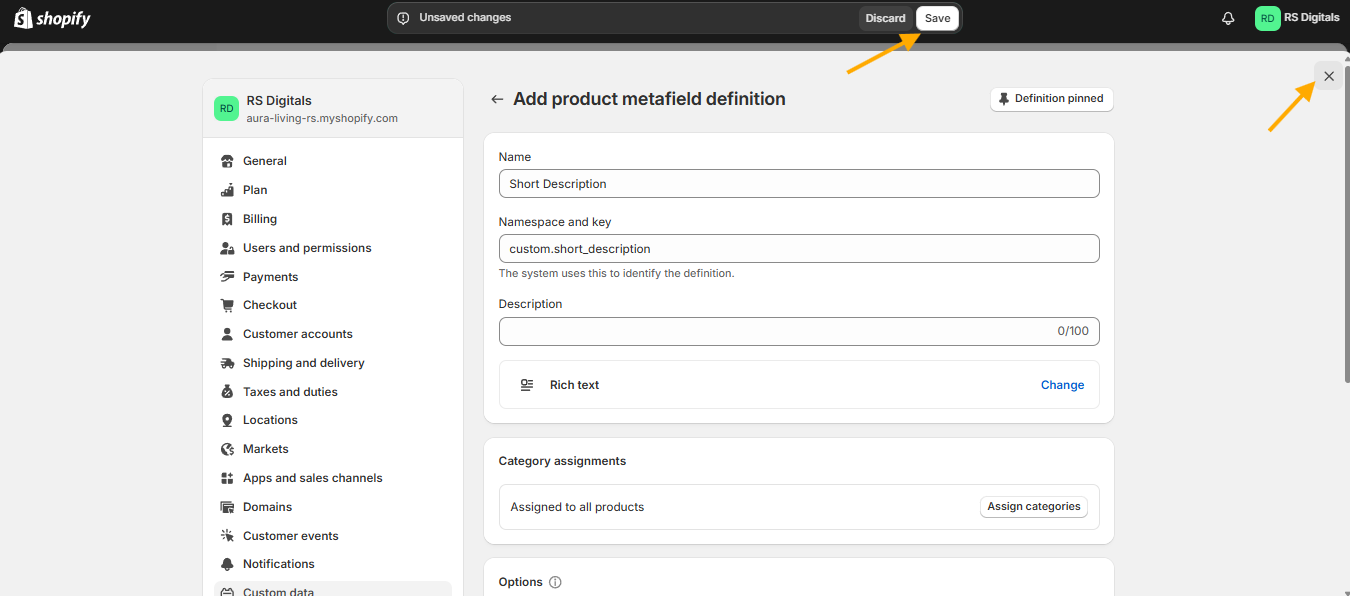
After selecting the metafield type, simply click the Save button at the top. Then, click the Close icon to exit the settings page and check if the metafield is displaying on your products. Refer to the screenshot below for visual guidance:
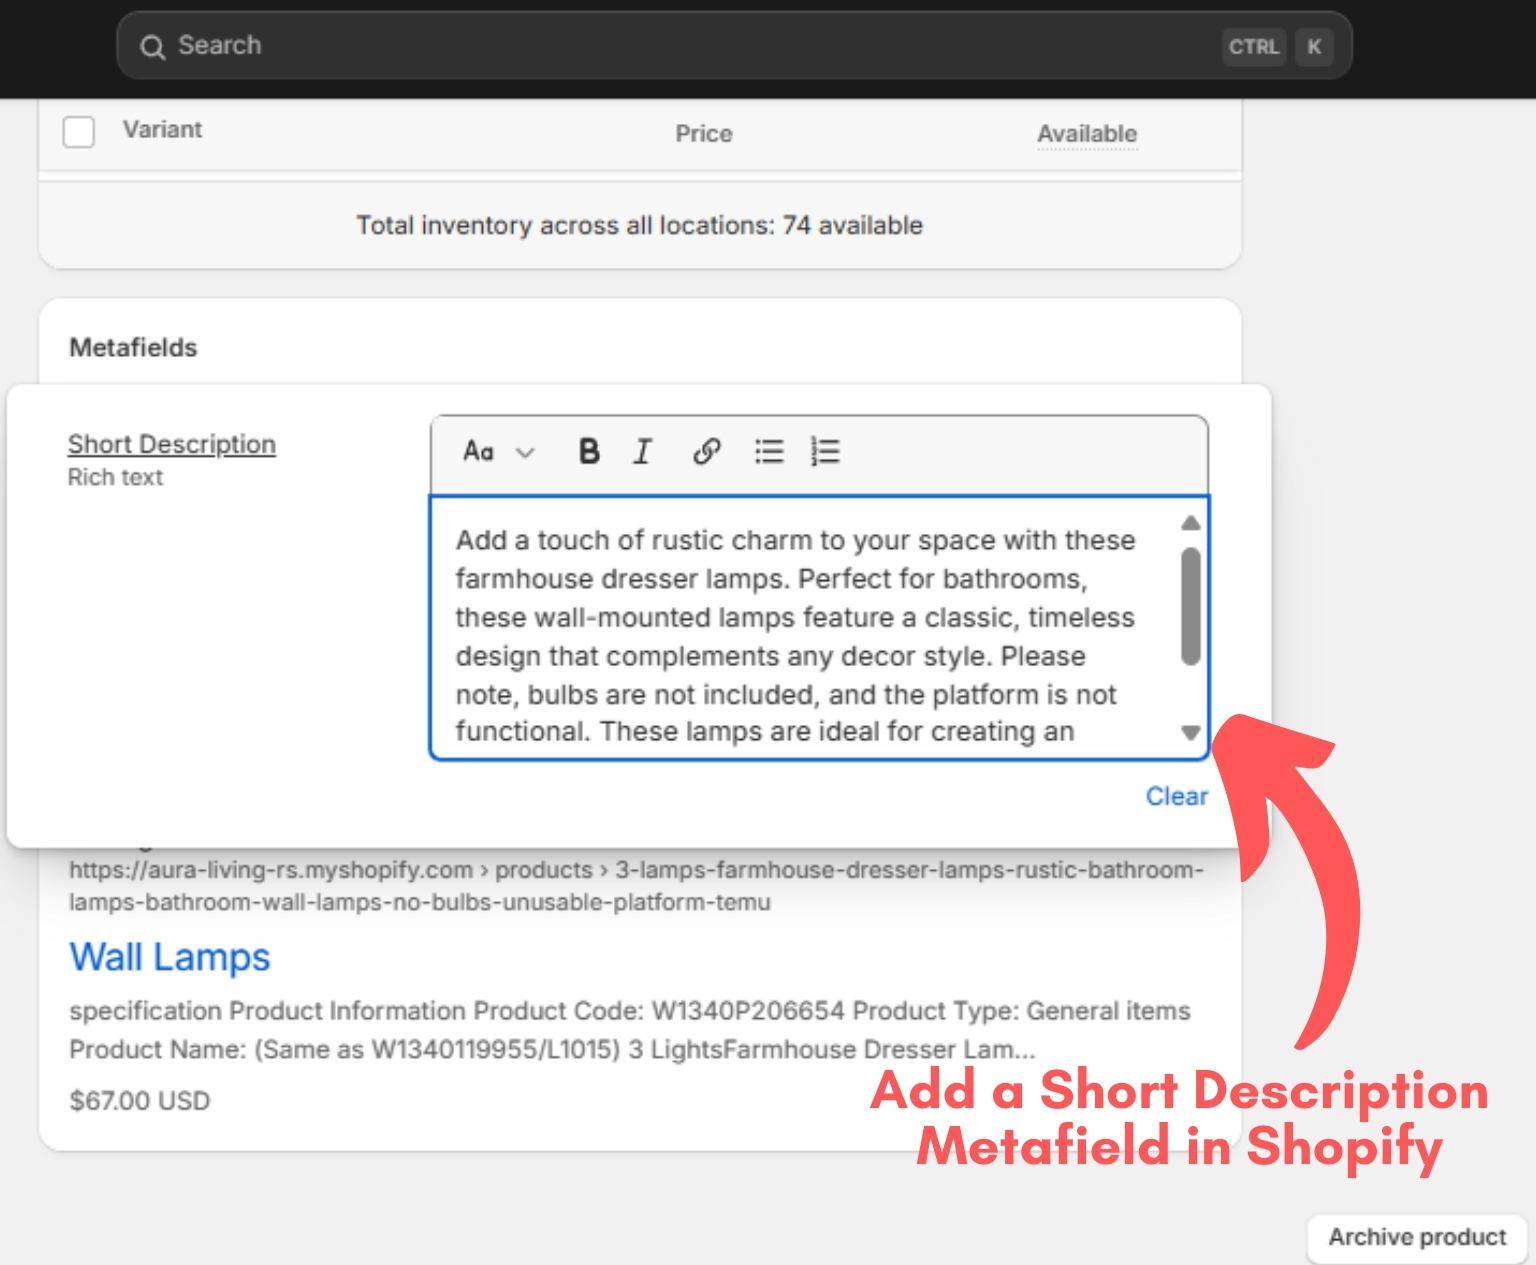
To verify the metafield, go to Products in your Shopify dashboard and select any product. Refer to the screenshot below for visual guidance:

On the product page, scroll down to the bottom, and under Metafields, you’ll find all the fields you’ve created for the product, including the short description metafield. Refer to the screenshot below for visual guidance:
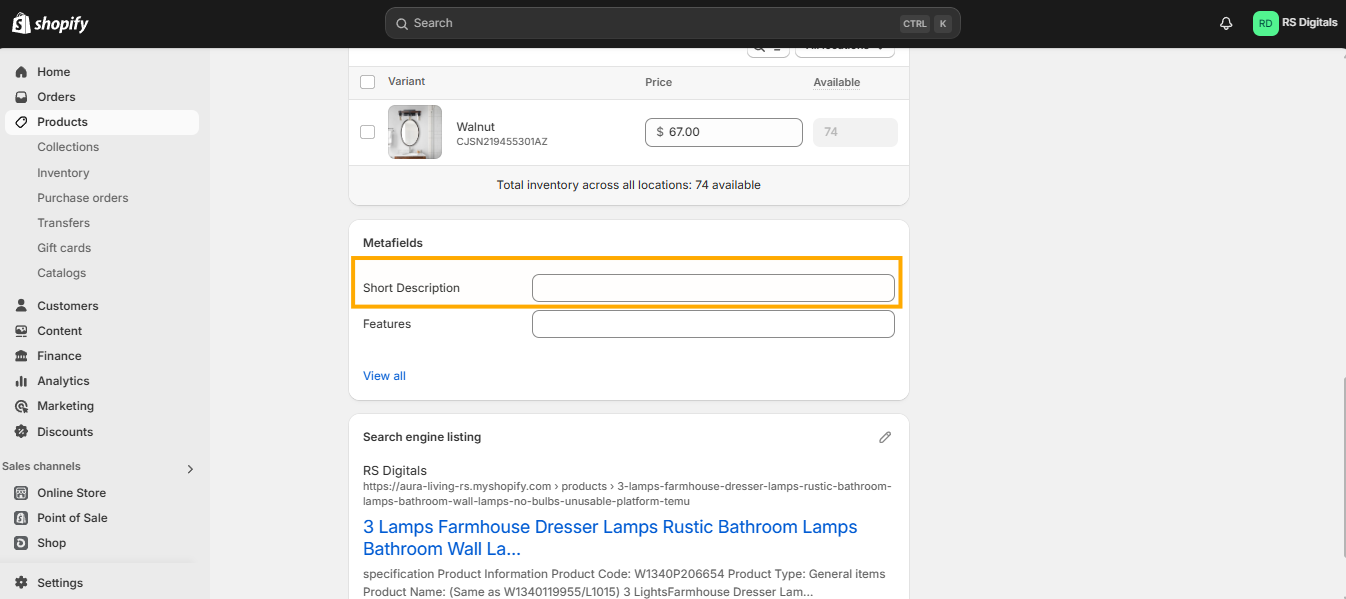
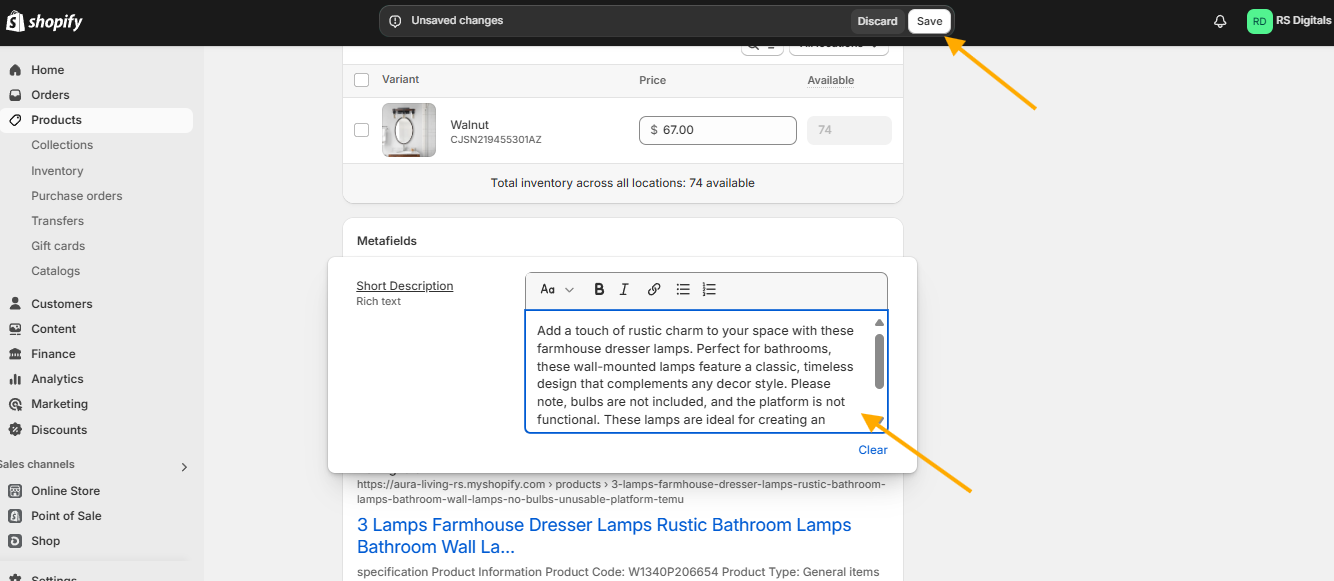
Add your text content, such as a single paragraph, in the short description field, and don’t forget to save the product. Refer to the screenshot below for visual guidance:
Now that we’ve created the metafield and added text to it, the next step is to display the short description on your product pages in Shopify. To achieve this, you’ll need to add the metafield to your product template. Follow these steps to get started:
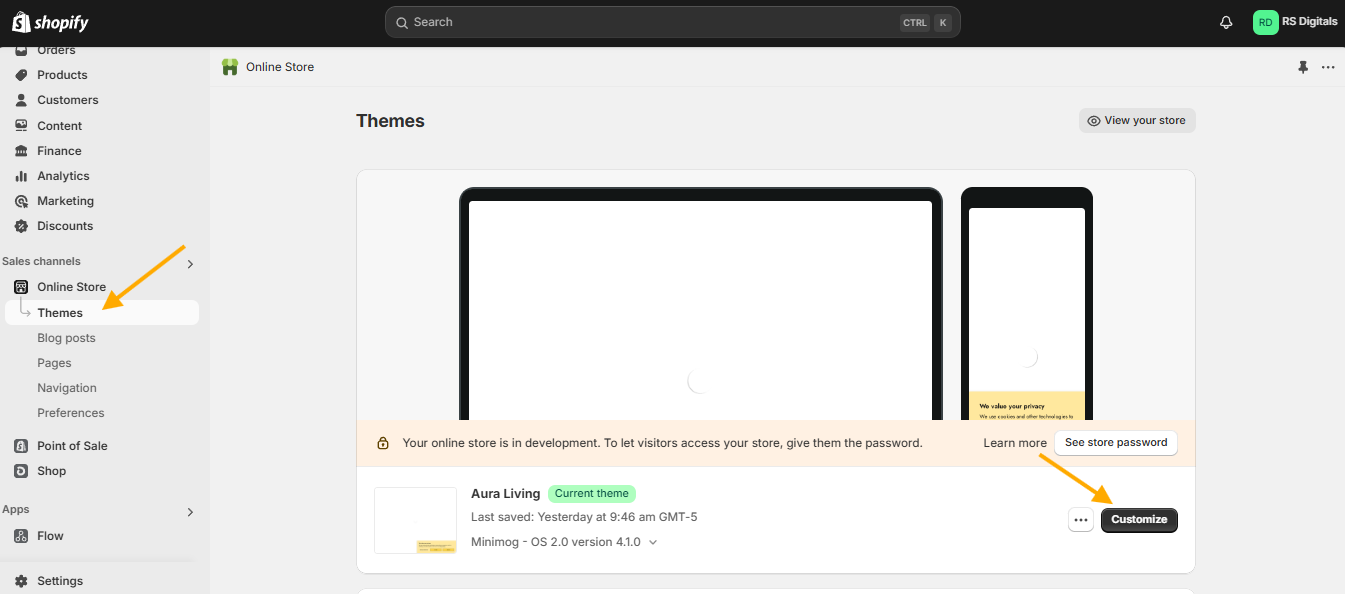
- In your Shopify dashboard, go to Online Store > Themes.
- Click the Customize button to open the theme editor.
Refer to the screenshot below for visual guidance:
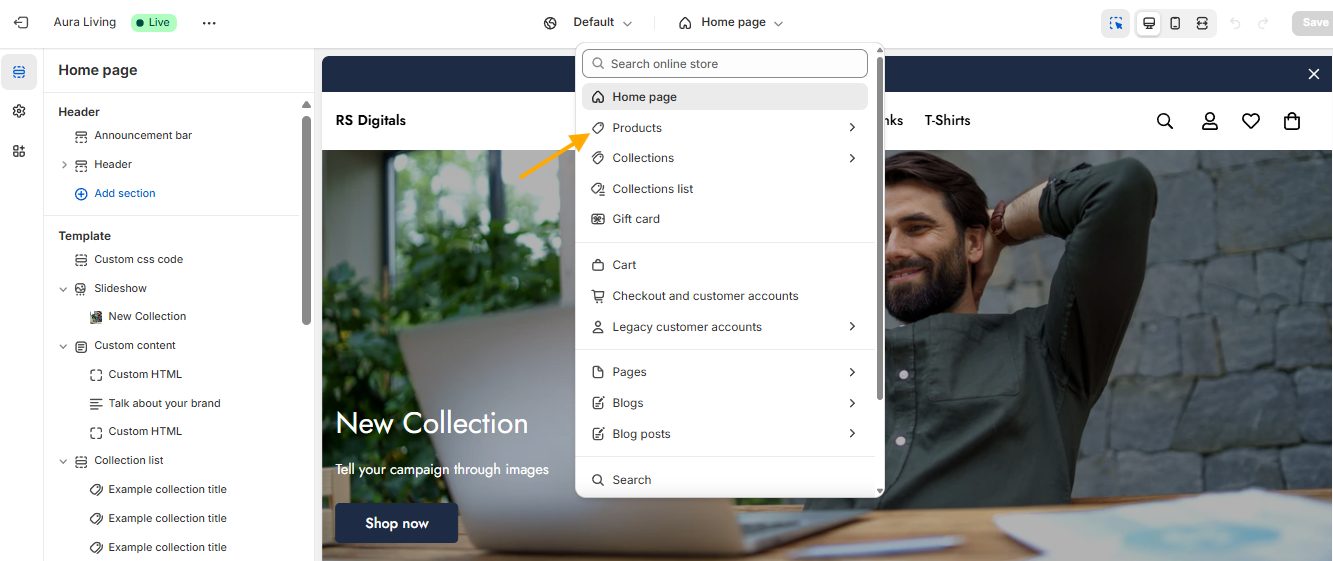
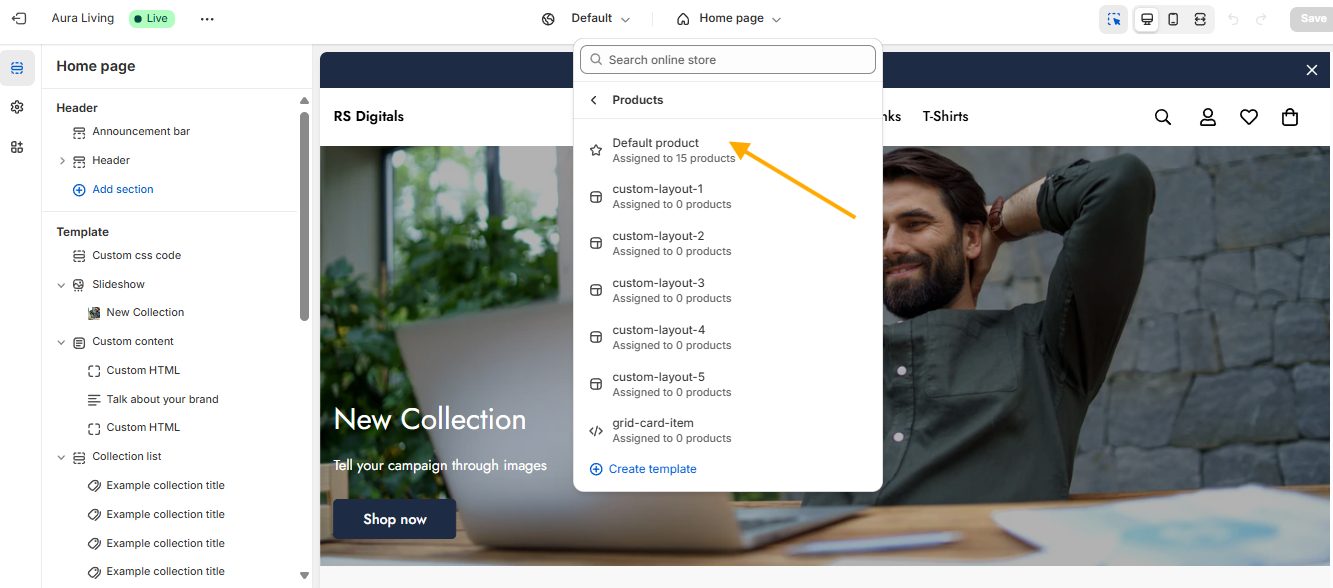
In the theme editor, click the top dropdown menu and select Products since the metafield we created is specifically for products and will only work on product pages. Refer to the screenshot below for visual guidance:
From the Products dropdown menu, select the product template where you want to display the short description. In this guide, I’ll use the Default product template as it applies to all products. Refer to the screenshot below for visual guidance:
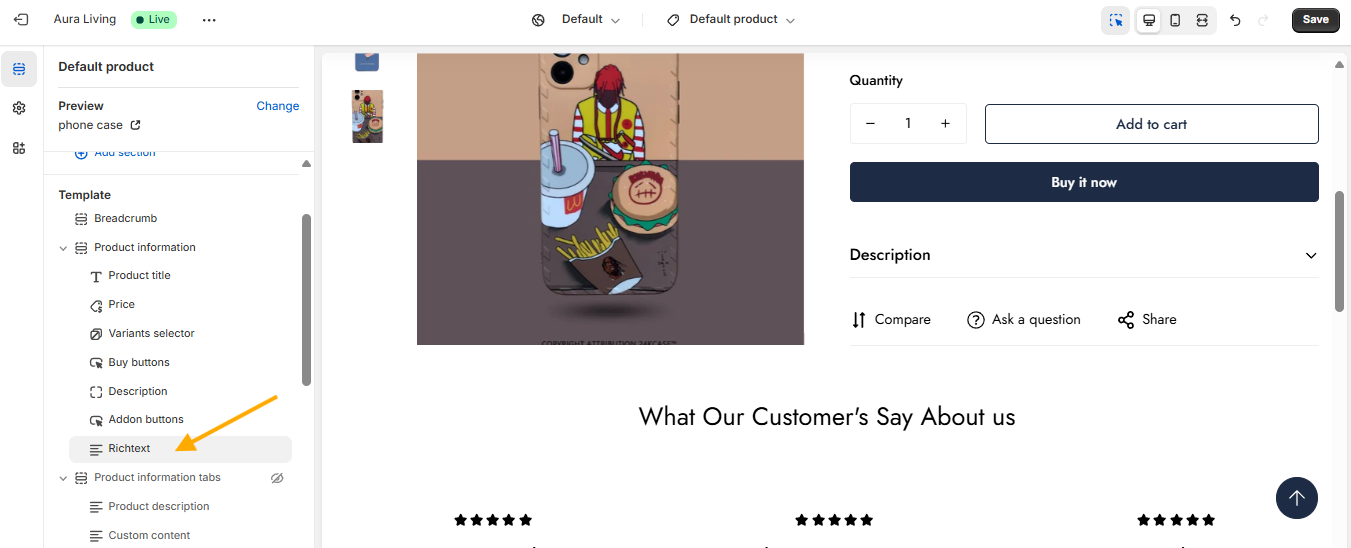
On the product page, we need to add a text block to integrate the metafield and display the short description. Different Shopify themes offer different block options for displaying text content. In this tutorial, I’m using the Minimog theme. If you’re using the same theme, you’ll see the exact options I’m working with. If you’re using a different Shopify theme, the options might vary, but the process remains similar.
The key is to add a text block because the metafield we created contains text. To add a block that supports text, follow these steps:
- Click the + Add Block button under the product information section.
- Choose a block type that allows you to add text. In my case, I’ll select Rich Text.
Refer to the screenshot below for visual guidance:

After adding the Rich Text block, click on it to explore the available options for this block. Refer to the screenshot below for guidance:
Under the Rich Text block, click on the Connect Dynamic Source icon and select Rich Text from the list. Refer to the screenshot below for guidance
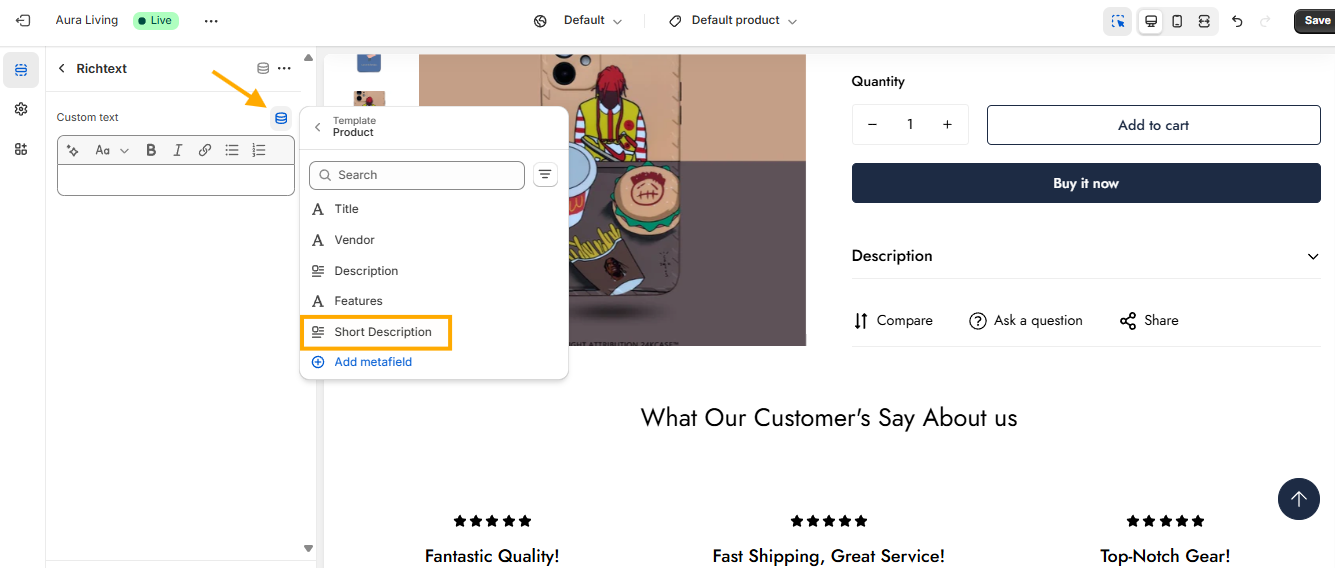
Refer to the screenshot below to see how it looks when you select the Short Description from the dynamic source dropdown. You can now drag and drop this block to the desired position where you want this information to appear. Once you’re satisfied, click the Save button to apply the changes. Check the screenshot below for visual guidance:
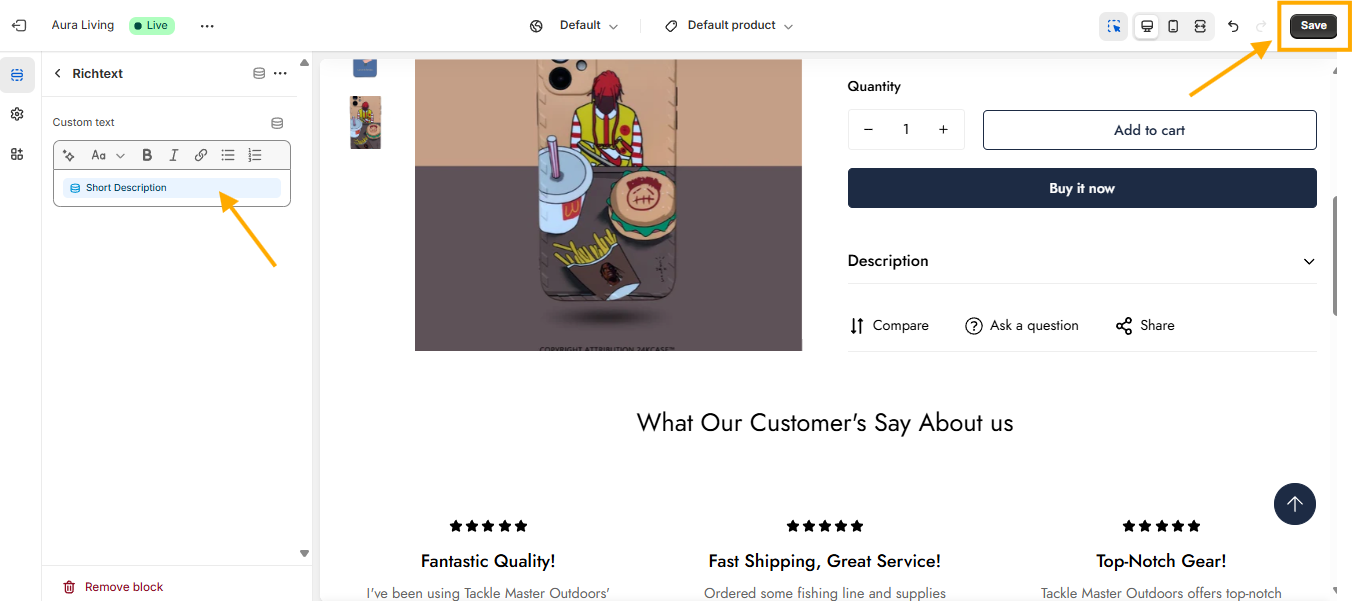
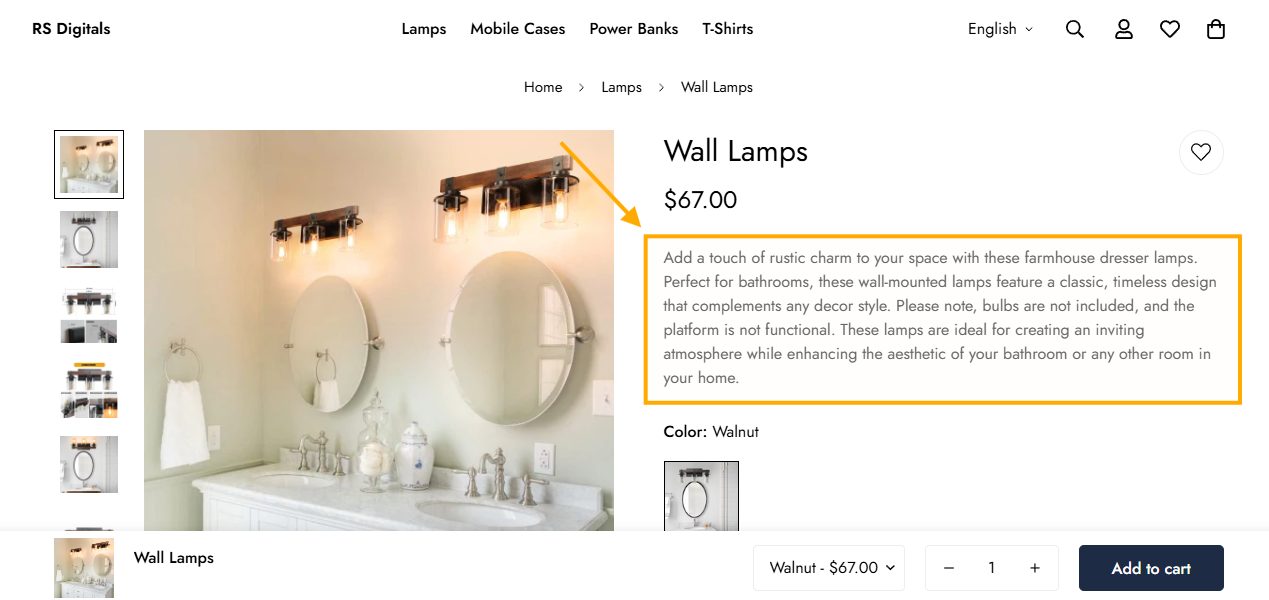
I’ve placed the short description block just below the product price, as this is a common and suitable position for displaying short descriptions. Many eCommerce stores use this placement to ensure key information is easily visible to customers. Check out the screenshot below to see how it looks on your product pages
Wrapping It Up: Enhance Your Shopify Store with Custom Metafields
Here you go! The addition of a custom metafield to brief descriptions in Shopify is a straightforward but powerful method to improve the look of pages for your items and supply customers with important information in one glance. By following this step-by-step guide, you can create a more engaging shopping experience while keeping your store organized and visually appealing. Be aware that even small adjustments such as this can have a significant impact on how customers experience your store. If you’ve found this guide useful, please feel free to investigate other options to customize your Shopify store